How to Handle Imaging on Highly Reflective Surfaces
Photograph a machined metal surface or glossy plastic and part of the frame blows out to white. Even if there’s a defect in that area, it doesn’t show.
Lower the exposure and the reflection shrinks, but the whole frame darkens and other areas stop being visible. This piece organizes the ways to handle this situation.
Why It Blows Out
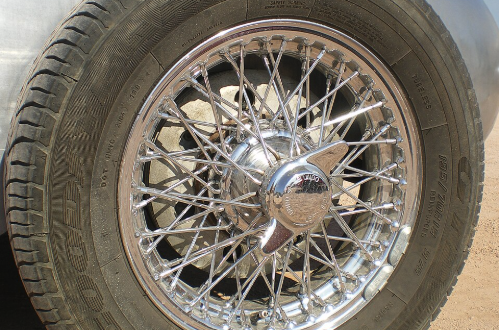
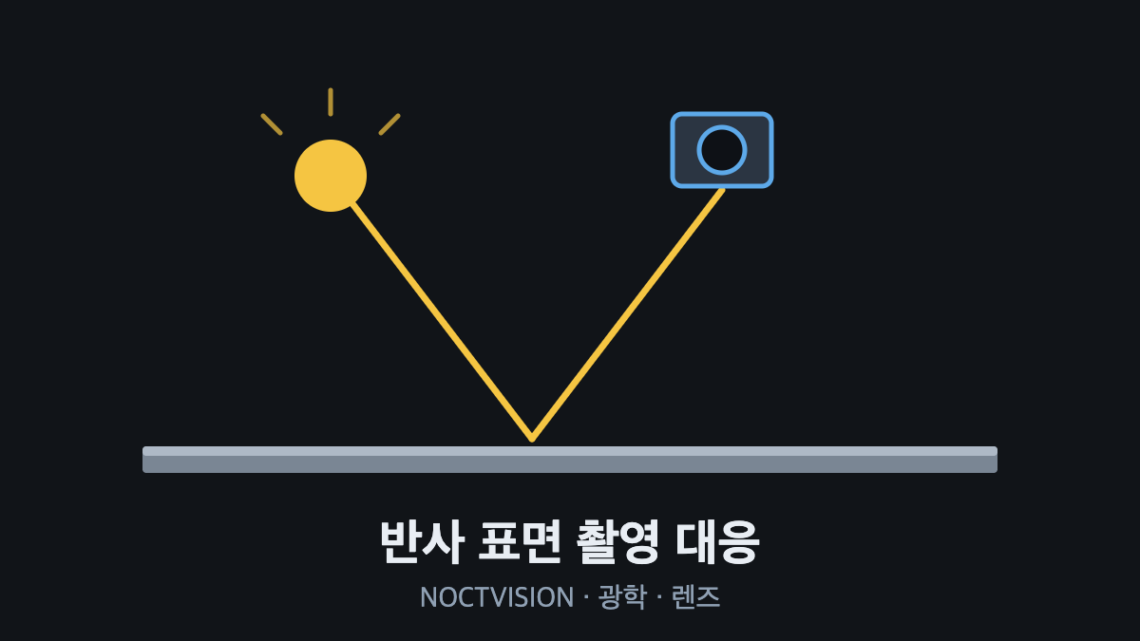
It happens because the target surface behaves like a mirror. If light leaves at the same angle it arrived at, and the camera happens to sit on that path, the light source itself gets captured directly.
A rough surface, like paper or a molded part, scatters light in many directions, so this problem is smaller. The glossier the surface, the more light concentrates into one direction, and avoiding that direction is the starting point for a solution.
Method 1 — Change the Angle
This is the first thing to try, and it costs nothing.
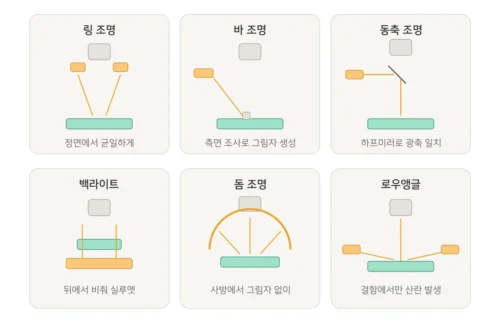
Move the lighting to the opposite side of the camera, or lower its angle, and the reflected light misses the camera. A bar light placed off to the side falls into this category.
Limitation — This works when the surface is flat. If it’s curved or has mixed slopes, some reflection remains no matter what angle you use.
Method 2 — Use Coaxial Illumination
Instead of avoiding the angle, this method goes straight at it. Send light along exactly the same direction as the camera’s optical axis, and a flat surface lights up evenly while only the tilted portions come out dark.
This isn’t an approach that eliminates the glare itself — it’s one that makes the glare uniform so variation on top of it becomes visible. It’s used often for reading stamped metal markings.
Limitation — Light volume drops significantly passing through the half-mirror. Securing enough brightness becomes a challenge on high-speed lines.
Method 3 — Wrap It in Dome Illumination
For a glossy surface that’s curved or has surface relief, angle adjustment alone won’t solve it. Dome illumination — which bounces light once off the inside of a semi-reflective hemisphere to light the target evenly from every direction — is the answer here.
Because there’s no strong light source from any one direction, no standout bright spot forms. It’s well suited to checking printing on cans, bottles, or curved parts.
Limitation — No shadows also means surface relief doesn’t show up either. It’s fundamentally at odds with step-height detection. The fixture is also large and needs installation space.
Method 4 — Use Polarizing Filters
This method mounts a polarizing filter in front of the light and another in front of the lens, with the two filters’ axes set perpendicular to each other.
Specular (mirror) reflection preserves its polarization state, so it gets blocked at the second filter. Light scattered off the surface, on the other hand, has its polarization scrambled, so part of it gets through. The net effect is that glare specifically is selectively reduced.
Limitation — Light volume drops significantly passing through two filters. Also, how well a metal preserves polarization on reflection varies by material, so the effect can end up smaller than expected.
Method 5 — Shoot Multiple Frames and Combine Them
If one shot won’t do it, there’s the option of taking several.
- Per-direction capture — Set up lighting from several different directions, capture one frame per light turned on individually, then composite by picking only the correctly exposed region from each frame.
- Per-exposure capture — Shoot several frames at different brightness levels to widen the dynamic range. The blown-out area gets filled in from the darker exposure.
Limitation — Time cost scales with the number of shots, and it doesn’t work if the target is moving. It’s limited to cases where inspection happens with the target stationary.
The principle behind each lighting method, and where it fits or doesn’t, is laid out in Six Machine-Vision Lighting Methods and How to Choose.
Selection Criteria
| Situation | First to consider |
|---|---|
| Flat metal, stamp-marking readout | Coaxial illumination |
| Flat metal, scratch detection | Low-angle |
| Curved/cylindrical, print check | Dome illumination |
| Transparent (film, glass, etc.) | Backlight |
| Tight installation space | Angle adjustment + polarization |
| Target is stationary | Multi-shot compositing |
Order to Try
Checking these in order before buying equipment is the more economical path.
- Try changing the lighting angle — cost: 0
- Adjust exposure and aperture — cost: 0
- Try a polarizing filter — low cost
- Change the lighting method — coaxial, dome, low-angle
- Consider multi-shot capture — accepting a longer takt time
More often than you’d think, steps 1 and 2 alone solve it. The time spent moving around the lighting you already have, before buying anything new, is never wasted.
Closing
A reflection problem can’t be handled by an algorithm. A saturated pixel is a pixel with no information in it.
If the top of the histogram is clipped flat, that’s the signal to go back to the lighting.
The content of this article summarizes general principles. Please validate against your own target and environment before applying it in practice.
Related Reading — Six Machine-Vision Lighting Methods and How to Choose


You May Also Like
Six Machine-Vision Lighting Methods and How to Choose
Software-Defined Lighting: One Head, Switching Between Dark-Field and Coaxial Illumination